Portraits layered over mountain ranges, flowers dotting the contents of a coffee cup, a cityscape rising from the ocean. The possibilities for creative captures are limitless when you dive into the world of double exposures. While they may seem intimidating at first, film double exposures are not as complicated as you may think. Here are some tips about how to capture a great double exposure on film!
Camera
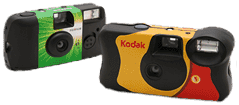
Not all cameras can shoot double exposures. Some older, fully manual cameras allow you to stay on the same frame between shots making it very easy, but other cameras have to be “tricked” into doing so. To keep it simple, we recommend getting a camera that has a dedicated setting for multiple exposures. Unsure if your camera can shoot double exposures? Do a quick Google or YouTube search on your camera’s specs and you should be able to find out quickly.
If your camera does not have a multiple exposure setting, you can always (1) shoot a roll of exposures, (2) pull the leader when the roll is finished, (3) reload it into your camera, (4) and shoot over it again creating double exposures. The only trick with this technique is being careful to align your second set of frames while keeping your first set in mind. It’s a lot to remember! If you choose this method, you may want to take notes on your first frames and be sure to reload your film the same way you did for your first set.

Film
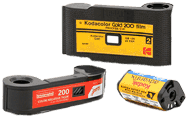
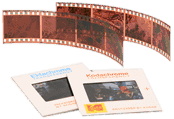
For the best double exposures, we suggest using black & white or color negative film as they have good exposure latitude which means they handle over-exposure well, making metering much less intimidating. Between the two, we highly recommend black & white since its lack of color simplifies overlapping images and has the best exposure latitude. While you can capture double exposures on E-6 slide film, you will need to play very close attention to your metering since it has less exposure latitude and is much less forgiving when overexposed.
Metering
For most people, metering correctly is the most intimidating aspect for double exposures. The good news is, with the right film selection you can pretty much meter normally without blowing out your photos. Yes, a double exposure literally means you’re exposing the frame to light twice so you can cut each exposure in half to equal them out. With that being said, since black & white and color negative film do so well with overexposure you’re still likely to get great results if you shoot each exposure normally.
The best way to master metering for double exposures is simply to go out and try it. In the end, it all depends on the results you want and the framing of your shots. Keep this in mind: anything that is white/bright will destroy information and anything black/dark will maintain information for the next exposure. So the shadows from your first exposure will be filled by your second exposure and the highlights from the first exposure will be pretty much gone. As seen in the 3 part graphic: If your first exposure is a silhouette, the dark silhouette will retain the overlapping information of the second image and the white/bright part of your first exposure will get rid of it.
There you have it. All it takes to start capturing some amazing double exposures on film is the right camera, some forgiving film, careful metering, and a creative eye! Below are some double exposure examples with some insight on how they were created.


 My Account

