


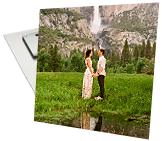

Explore the seriously intense red, orange,
and yellow tones of redscale images
Redscale images are simply created by exposing the other side of the film. You can buy redscale film, but it can be expensive or hard to find. This article illustrates how you can create your own with regular 35mm film and rewinding it into an empty 35mm canister.

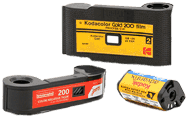
Unsure about doing it yourself? Buy rolls online.


Lomography Redscale | Rollei Redbird | Svema Red Scale
Converting your regular 35mm film to redscale is easy and here’s the step by step instructions on doing it:
-

- 1) To start, you need a full roll of 35mm film, an empty roll of film (or unspool a full roll), tape and scissors.
-

- 2) Cut the leader off of the full roll. Also square up the tab on the empty roll.
-

- 3) Tape ends together on both sides, making sure the emulsion sides are facing the opposite way. You’ll notice a distinct difference in color like in illustration.
-

- 4) Trim tape from the sides.
-

- 5) DO THIS IN A COMPLETELY DARK ROOM!! A closet or bathroom at night tend to work well. Wind the empty canister so that all the film is spooled off from the full canister.
-

- 6) Cut the film from the previously full (now empty) canister.
-

- 7) Cut a leader by using the old leader as a general guide.
-

- 8 ) You’re done and now have rescale film. Loading film can be a little tricky because the film is curling the wrong way
Notes:
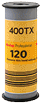
- Adust Exposure – Because light travels through the backing layer, the ISO of the film is lowered, usually by about 2 stops (if you are after that reddish look). Some redscale films can be severely overexposed to remove the red cast, for instance, Lomography Redscale XR 50-200. Lomography recommend shooting between 50 an 200 ISO
- Keep the old/empty canister to you can convert other rolls of film.
- Easy Film Developing – Developing redscale film is the same development process as with normal 35mm color film, so you don’t have to worry about special development needs. Don’t forget, we develop redscale film and will do a great job.
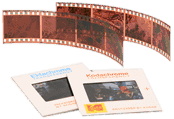
Redscale Film Examples


